If you are running a WordPress website, there are chances that you want to customize it to your preferences. You may like to add code to say add disclaimer in the website footer. Or you may like to control the visual design and the layout of your web-pages; like updating the color of links.
Each WordPress theme offers two important files where you can add these customizations:
- functions.php:
The functions file behaves like a WordPress Plugin, adding features and functionality to a WordPress site. You can use it to call functions, both PHP and built-in WordPress, and to define your own functions.
— WordPress Codex
This file is used for adding functionality like registering custom widget areas or to show WordPress featured image on single post or page.
- style.css:
The style.css is a stylesheet (CSS) file required for every WordPress theme. It controls the presentation (visual design and layout) of the website pages.
— WordPress Codex
This file is used for enhancing the presentation of your website like changing the font, setting the background image for a webpage, etc.
Here’s the quick guide to edit functions.php in WordPress.
And here are two simple ways to edit style.css to tweak the visual appearance of your website:
Access style.css by using Code Editor (like Notepad++ / Brackets / Sublime Text)
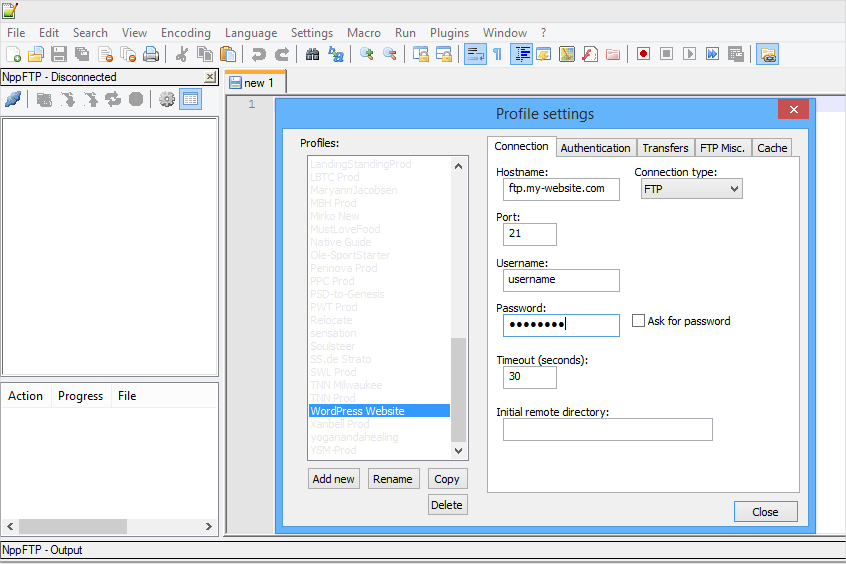
The code editors like Notepad++ support FTP integration. This means you can download the file from server, make the required edits to the file directly in the code editor and upload the updated file back to the server.
For this you need to establish FTP connection to the remote server where your website is hosted. You will need the following details to connect to your website via FTP (for transferring the files to and from the server to the code editor):
- FTP Hostname: The FTP hostname for the website is the name of your FTP server, the place where your web host stores all the files uploaded by you. The FTP host name is usually same as the domain name with ftp prefixed as ftp.my-website.com (where the domain name is my-website.com).
- Username (provided by your website host)
- Password (provided by your website host)
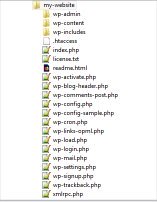
After setting up the FTP connection via code editor, connect to the website host. Once connected, you will be able to view the directory listing on the remote server.
Follow the steps given below to edit style.css:
- Locate style.css by following the directory structure given below:
[WordPress Root] > wp-content > themes > [current_theme] > style.css.
- Double click on the file (style.css) to initiate the file download.
- Update the downloaded file with the required css code.
- Save the file to upload the updated version of the file to the server.
Access style.css via WordPress Admin area
- Log in or sign in WordPress as an administrator.
- Select “Appearance > Editor” from the left panel in WordPress Dashboard.
- In the editor, select the theme which you want to edit from “Select theme to edit” drop-down menu.
- Locate and double-click “Stylesheet (style.css)” under “Theme Files” under “Styles” section.
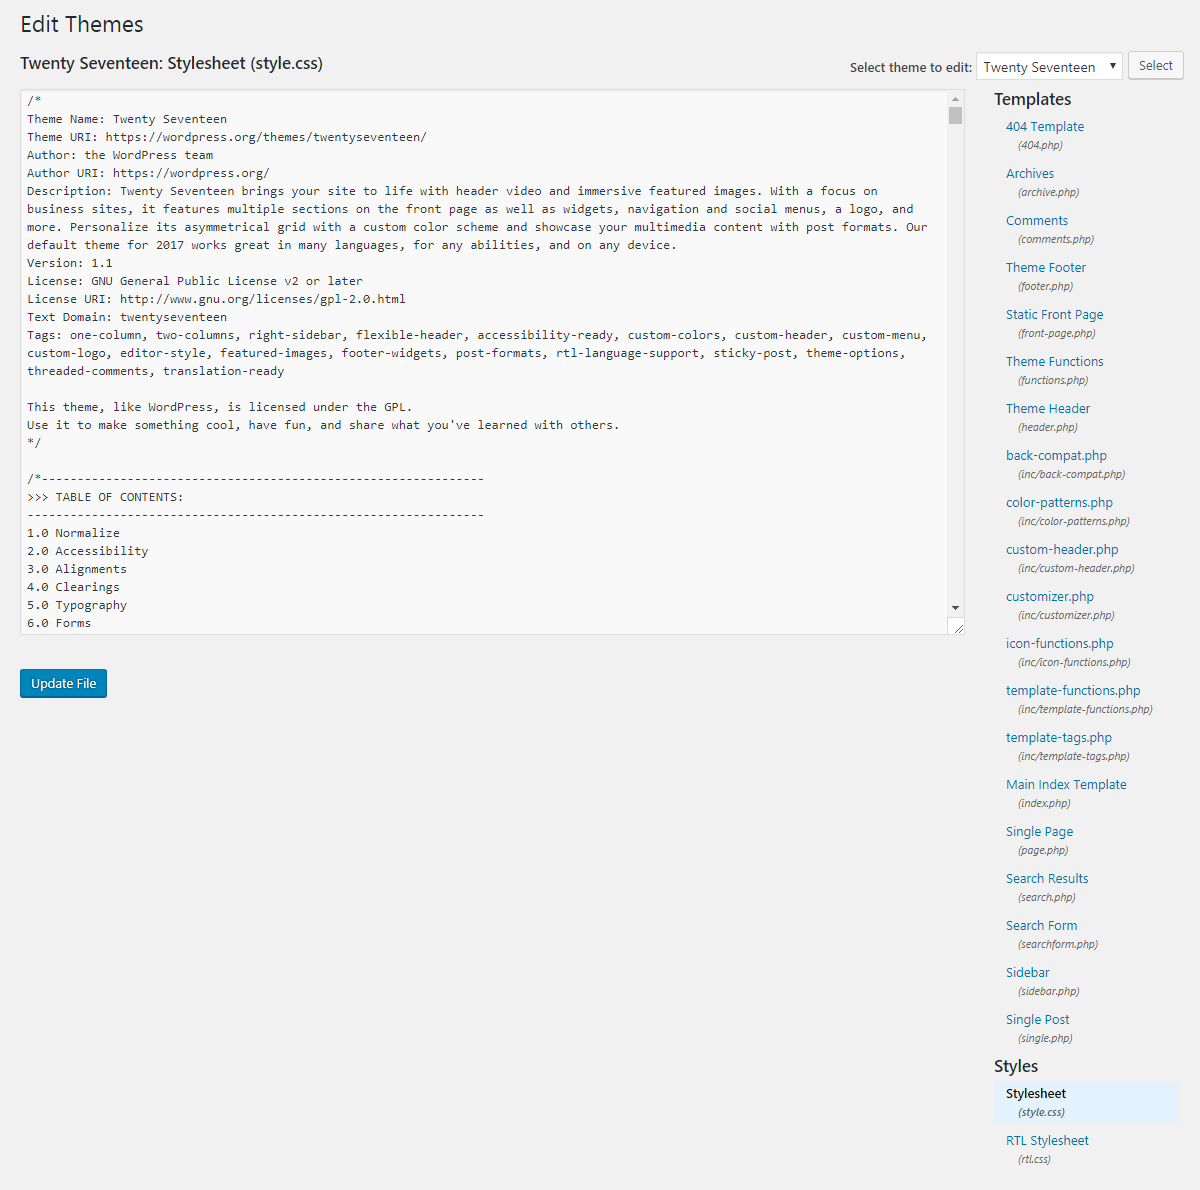
Locate style.css in WordPress Theme Editor (Appearance > Editor) - Make the desired changes to the file and click “Update File” to reflect the changes made to the file.
- Reload the frontend of the website to view the live changes. Sometimes you may not be able to view the CSS changes on the front-end. You will need to clear / flush the cache to review the design updates.
Always back-up style.css before making any changes; the backup file always comes in handy for restoring the default file in case you are planning to revert back to the initial version of the design.
Need help? Drop me a line.
