
Git is a part of the workflow of any serious coder. Git has many benefits over other version control systems like SVN CVS etc. The only problem getting started is the learning curve involved (as it is with any other system). Installing cryptic GUIs with so many menus and functionalities only adds to the confusion. The beauty of the command-line is that it’s hides all this clutter and allows you to get used to one thing at a time. And once you are there, in no time you’ll be doing things that people using git GUIs can’t even figure out and get messed up. This post is not only about git (because that’s just the engine). This post is about using GitHub with git. Ready?
Prerequisites:
- Must have GitHub free or developer (paid) account.
- Have git installed on your local machine.
Installing Git
If you are on Linux or OSX, you’ll already have git installed on the system. If you are on OSX it comes bundled with XCode. If you are on Windows you can get git from the Git Homepage. Use the 64-bit installer (or 32-bit depending on your operating system). I recommend against portable version because you’ll need to mess up with the path and all. Installing git on Windows is simple. Just follow the on-screen instructions.
The Git GUI
GUI’s tend to hide what goes on in the background and make things more complicated than what’s required. Using Git is very easy. There are some basic commands and that’s all what you will ever need. If you still can’t quench your thirst, learn as you go.
One Time Setup
Setting up your git username globally
Git uses a username to associate commits with an identity. The Git username is not the same as your GitHub username. git config --global user.name "Firstname Lastname"
Setting up your git email globally
GitHub uses the email address set in your local Git configuration to associate commits pushed from the command line with your GitHub account.
git config --global user.email "email@example.com"
Here are the essential steps and commands in order of their usage sequence
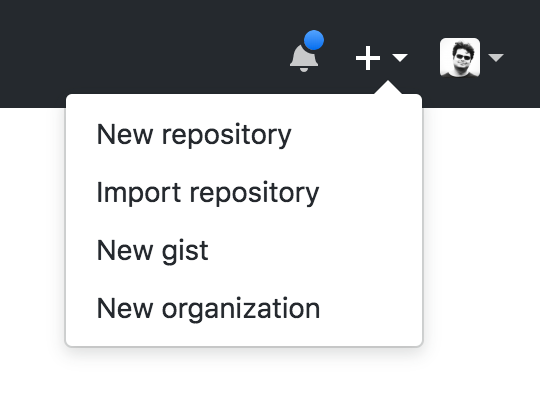
1. Initializing a GitHub repository
Login to your GitHub account and on the top right corner click the + icon. Click New repository.
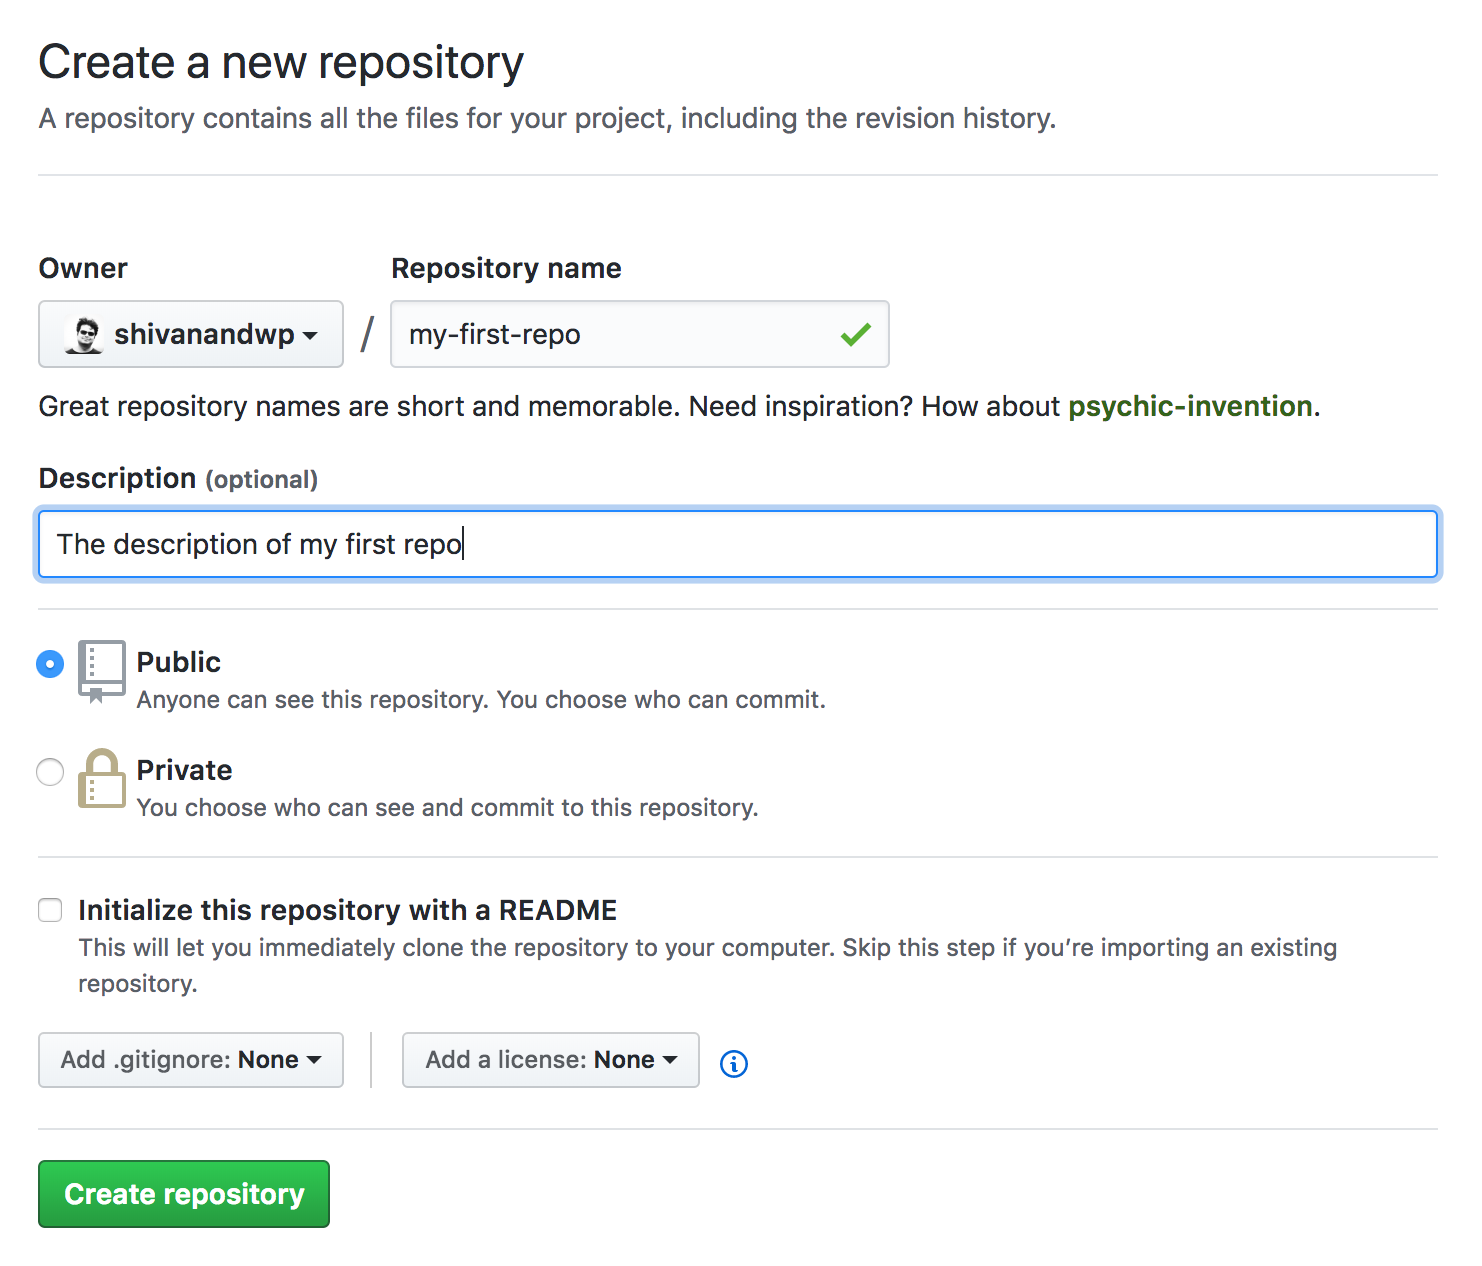
Enter the details for the repo:
2. Cloning the code from GitHub
Run the following command to download the code to your local machine. This command will create the repository folder and put everything inside it.
git clone https://github.com/shivanandwp/my-first-repo.git.
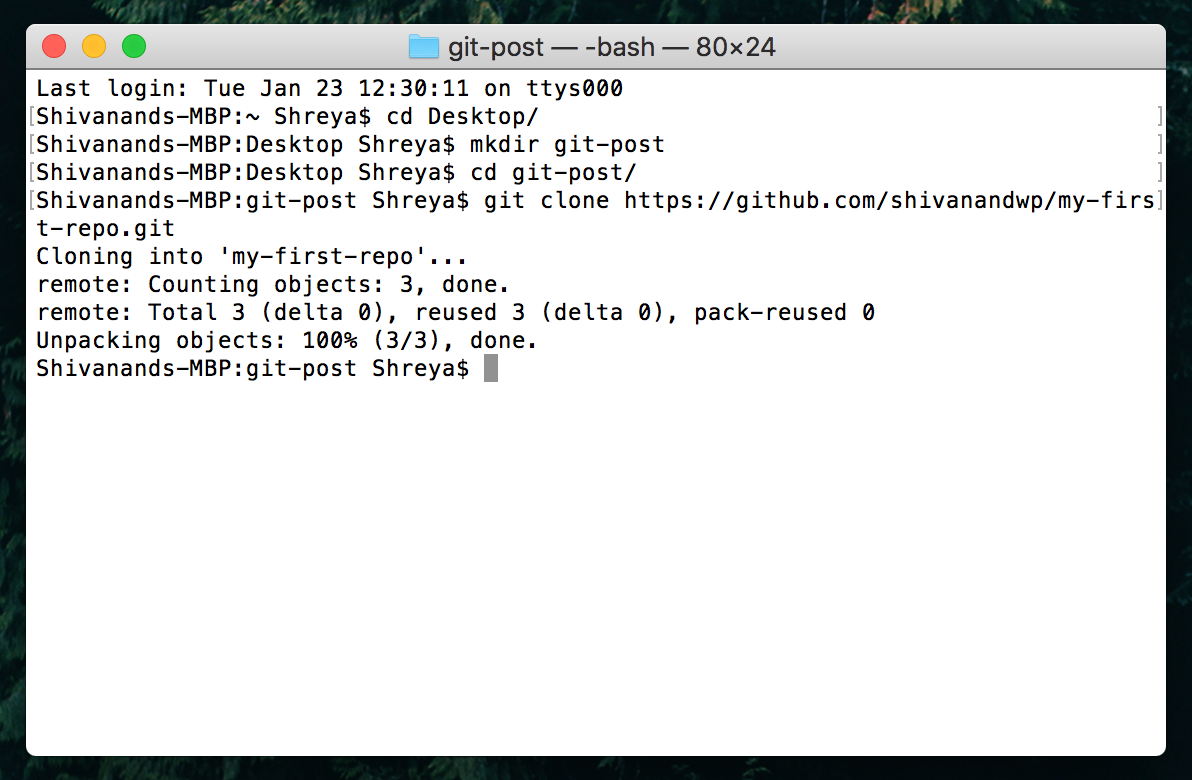
Now you will have a folder named my-first-repo in the current directory. Do a cd my-first-repo. Now you are inside that folder.
Work on your code:
Now you can use your favorite code editor to create new files, make changes etc.
If you want to download the contents into an existing folder run git clone https://github.com/shivanandwp/my-first-repo.git [path to local folder].
3. Checking the status of your local files
I just added a new file to the code and I’d like to check the status of the git changes. The status command will output the status of your files: git status

See the message in red? And below that it also says no changes added to commit. Next step:
4. Adding files for git to version track
It’s time to tell git which all files you want to track changes to. To do this you can use wildcards etc. But the simplest way is to tell git to track the current directory (including everything inside it): git add . Better yet use git add --all — this will add all files including the ones you delete. If you create newer files do pls do a git add --all again anyways.
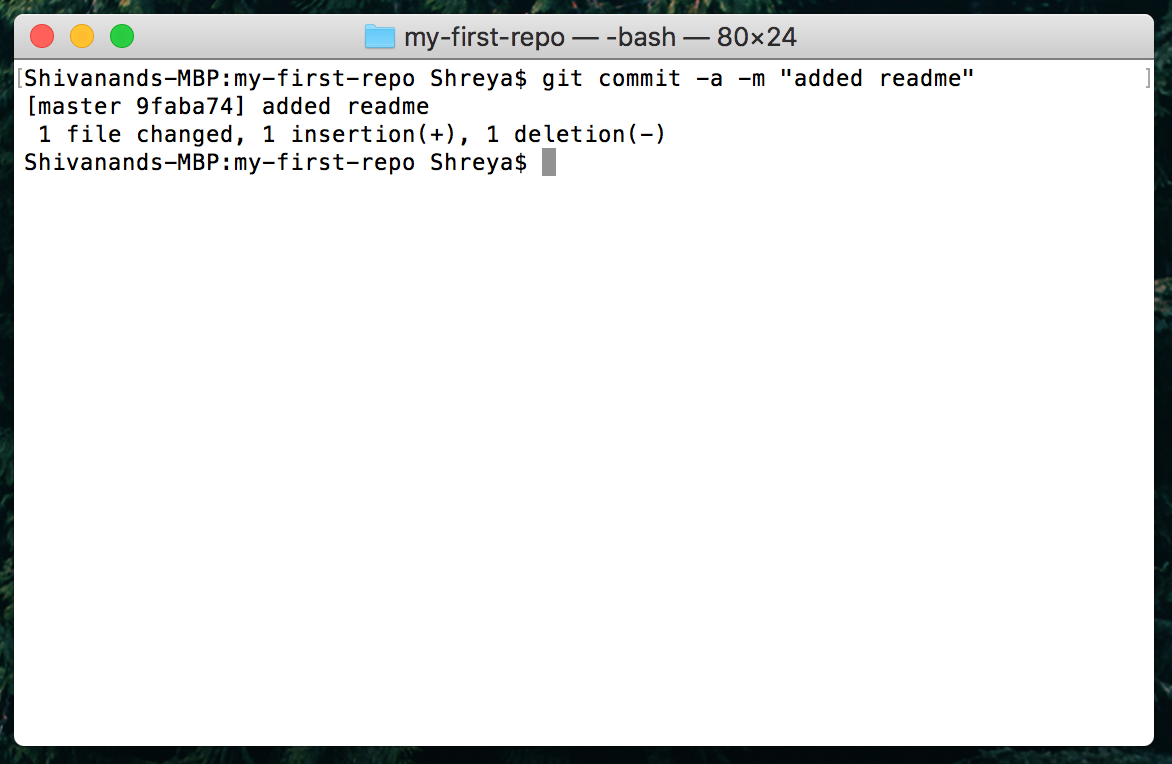
5. Committing the code
Committing the code is exactly what the command does, but only locally. You need to add a commit message to every commit.
Here’s the command:
git commit -a -m "message"
This command commits all the changed files.
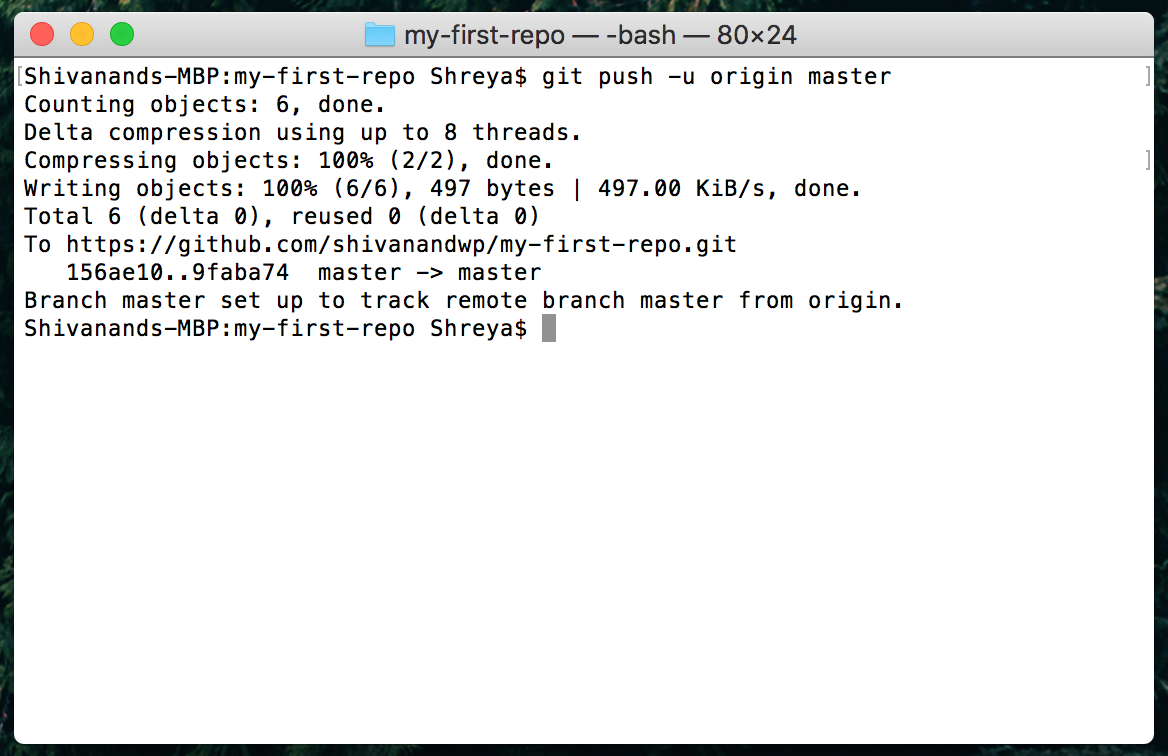
6. Uploading the commit(ed) changes to GitHub
Now that you’ve updated the code in the local repository, it’s time to upload the new code on GitHub. It’s important to understand the -u flag and the master keyword. The -u flag tells git to set the default upstream branch on GitHub. Here master is the name of the branch. Next time you do a push or a pull from the local machine, you won’t have to specify the -u flag or the branch. Git will know to use the master branch by default. git push -u origin master
Using the code hosted on GitHub on a new machine:
Now that you have your code hosted on a central GitHub repository, when you want to download and use the code on a new machine, just start from Step 2.
This is all you need to keep your always-updated code at a central repo. As you can see, maintaining versions of your code on GitHub is easy. But it does require some getting-used-to. And these simple commands come in handy when you are just starting out (so feel free to bookmark this post because I’ll keep it updated). Happy coding!
Also, you may like to check out my post on Mastering Git In A Day For WordPress Theme & Plugin Authors →.
